Easy DIY Hair Accessories
“Fashion is not something that exists in dresses only. Fashion is in the sky, in the street, fashion has to do with ideas, the way we live, what is happening.” – Coco Chanel
Welcome to the creative world of making your own stunning hair pieces that can compete with store-bought items. You’ll save money while expressing your unique personality through custom creations.
This complete guide walks you through various fun and fashionable projects. They’re perfect for teens and adults wanting to upgrade their daily appearance. Whether you’re new to crafting or have some experience, you’ll find making these items incredibly rewarding.
There’s no stress about finding the perfect fit. You’ll learn to create popular pieces like scrunchies, bows, headbands, and clips. The methods are simple and require little time or financial investment.
The true beauty lies in the versatility. You can customize colors, patterns, and decorations to match your personal taste. Create thoughtful handmade gifts that show you care.
Throughout this guide, you’ll discover inspiration from current trends. You’ll also find nostalgic favorites that have recently returned to popularity. Build an entire assortment of beautiful pieces that are gentle on your hair and wallet.
By the end, you’ll have the confidence and skills to make professional-looking items. You’ll be proud to wear them or share with friends and family.
Key Takeaways
- Create beautiful hair pieces that rival store-bought quality while saving money
- Express your unique style through customizable colors, patterns, and designs
- Perfect for beginners and experienced crafters with simple techniques
- Make trending items like scrunchies, bows, headbands, and clips
- Build a complete collection that matches your personal taste
- Create thoughtful handmade gifts for friends and family
- Develop skills to make professional-looking accessories with confidence
Introduction to Easy DIY Hair Accessories

Crafting your own fashionable hair items combines artistic freedom with practical savings. This approach lets you build a complete collection that matches your personal taste perfectly.
Overview and Benefits of DIY Hair Projects
Creating handmade pieces offers incredible benefits for both new and experienced crafters. These projects require minimal investment in time and materials compared to other sewing endeavors.
One appealing aspect is achieving store-quality results without the hefty price tag. Unlike garment sewing where fit can be challenging, these projects eliminate sizing concerns completely.
They serve as perfect confidence-building tutorials for those starting their crafting journey. The versatility means you can create pieces that complement specific outfits or express your personality.
Getting Inspired by Creative Trends
The current resurgence of 90s-inspired trends has brought scrunchies, bows, and fabric headbands back into the spotlight. This provides endless inspiration for your creative projects.
You’ll find these items incredibly practical because they allow experimentation with different fabrics and techniques. They don’t require committing to large pieces of material.
This post guides you through various skill levels, from simple no-sew options to more advanced techniques. Everyone can participate regardless of their crafting background.
Getting started opens up a world of creative possibilities. You’ll soon discover that making these pieces becomes an enjoyable hobby yielding beautiful, functional results.
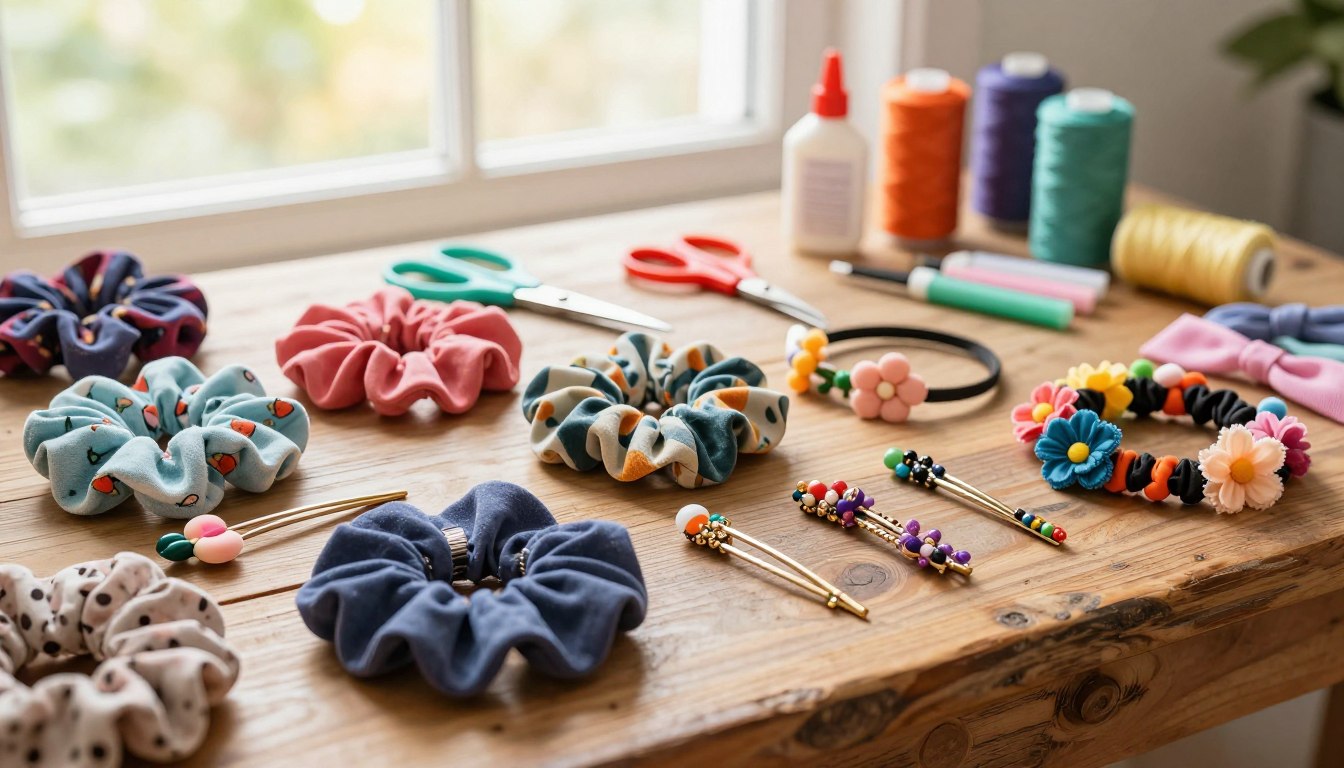
Materials, Tools, and Techniques

Before diving into your creative projects, understanding the essential tools and materials will set you up for success. Having the right supplies on hand makes the process smoother and more enjoyable.
Essential Sewing Tools and Supplies
Basic sewing equipment includes items you might already own. A sewing machine or simple needle and thread work perfectly for most projects.
You’ll also need fabric scissors, measuring tape, and pins. Elastic bands in various widths provide comfortable bases for different creations.
Selecting Fabrics and Accessories
Choosing the right fabric matters for both appearance and comfort. Soft materials like satin and velvet feel gentle against your strands.
Make sure to select textiles that won’t cause damage. Cotton and stretchy knit fabrics offer versatility for various styles.
No-Sew Alternatives for Quick Projects
Fabric glue creates strong bonds without any stitching required. This approach saves time and works well for quick creations.
Hot glue guns efficiently attach embellishments to clips and barrettes. They provide a reliable way to assemble pieces in minutes.
Make sure you use adhesive specifically designed for textiles. This ensures your finished items maintain their quality through repeated use.
Easy DIY Hair Accessories: Step-by-Step Tutorial

Let’s dive into hands-on projects that bring your creative vision to life with simple techniques. These tutorials guide you through creating beautiful pieces step by step.
Creating Hair Clips and Headbands
Fabric-covered clips offer a perfect starting point for beginners. Simply cut material to size and wrap it smoothly around clip bases using fabric glue.
For headbands, stretchy knit fabric creates comfortable options. Cut strips to appropriate lengths, sew the edges, and connect the ends. Braided designs add texture using t-shirt fabric or velvet.
Crafting Scrunchies and Hair Ties
The classic scrunchie remains a popular choice with seven size options available. Basic versions involve sewing fabric tubes and threading elastic through them.
Advanced patterns include scarf styles with long tails and decorative knot variations. For quick projects, no-sew knotted ties assemble in seconds using elastic cord and fabric strips.
Traditional hair ties provide gentle alternatives to rubber bands. Sew narrow fabric tubes and thread thin elastic through them for soft, comfortable holders.
Creative Variations and Style Ideas

The true artistry in handmade hair pieces emerges when you experiment with creative combinations and decorative accents that reflect your personal aesthetic. This stage transforms basic projects into signature items that showcase your unique vision.
Mix & Match Patterns for a Unique Look
Combining different fabric patterns creates visual interest and personal flair. Try pairing floral prints with geometric stripes or mixing polka dots with solid colors for unexpected harmony.
Texture mixing adds another dimension to your designs. Combine smooth satin with textured lace or pair velvet with leather accents. These combinations make each piece stand out.
Adding Embellishments: Bows, Flowers, and More
A classic bow design elevates any creation from simple to stunning. Create various sizes from petite accents to oversized statement pieces. Sailor bows offer a timeless, preppy aesthetic that works beautifully on clips.
Felt flowers provide wonderful versatility for decoration. Rolled flowers create rose-like blooms while folded flowers offer geometric appeal. Attach them to clips or headbands for garden-inspired accents.
The knot detail adds sophisticated styling to any piece. Whether it’s a top knot on a headband or side knot on a scrunchie, this technique creates dimension and interest.
Tips for Beginners and Time-Saving Hacks
Every crafter appreciates clever tricks that save time while producing professional-looking results. This section provides essential guidance to streamline your creative process.
Starting with simple projects builds confidence quickly. No-sew options are perfect for your first attempts.
Quick Techniques and Template Use
Using a template is a major time-saver. It ensures consistency when making multiple pieces.
Cut several fabric layers at once to create a whole collection in no time. Fabric glue offers a speedy alternative to sewing.
You can complete beautiful items in 30 minutes or less. This is often faster than wrapping a present!
Troubleshooting and Pro Tips
Practice new stitches on scrap fabric first. This prevents wasting your favorite materials.
If a scrunchie feels too tight, simply use a longer piece of elastic. Pressing seams with an iron gives a polished finish.
Reinforce stress points with extra glue or stitching for durability. Keep a small kit of supplies ready for spontaneous projects.
For ongoing inspiration, consider free email tutorials. They deliver step-by-step guides directly to your inbox.
- Start Simple: Build skills with no-sew projects before advancing.
- Use Templates: Free patterns online ensure perfect sizing.
- Reinforce Stress Points: Add extra glue or stitches where wear occurs.
- Keep a Project Kit: Have essential tools organized and ready to use.
Conclusion
As you complete these crafting projects, you’ve unlocked a world of personalized style possibilities. Each handmade piece reflects your unique creativity and growing skills.
The beauty of this collection lies in its customization potential. You can create items that match any outfit or mood perfectly. These handmade creations make wonderful gift ideas for loved ones.
Consider assembling coordinating sets for special occasions. Your sewing techniques now extend beyond basic projects. Share your finished looks with crafting communities for inspiration.
Don’t stop your creative journey with this post. Continue exploring new ideas and developing your signature style. Sign up for email updates to receive fresh project inspiration.
Remember the satisfaction of wearing something you made yourself. Keep building your collection one beautiful piece at a time.
FAQ
What are the best fabrics to use for a scrunchie?
I don’t have a sewing machine. Can I still make these projects?
Where can I find patterns or templates for beginners?
How can I make my creations look more professional?
Are these projects a good gift idea?
What’s the quickest project I can try first?

Eduard Kingly is a travel and lifestyle content creator with a focus on personal development and education. He combines firsthand travel experiences with research-driven insights to guide readers in discovering new places, building better habits, and pursuing meaningful learning.