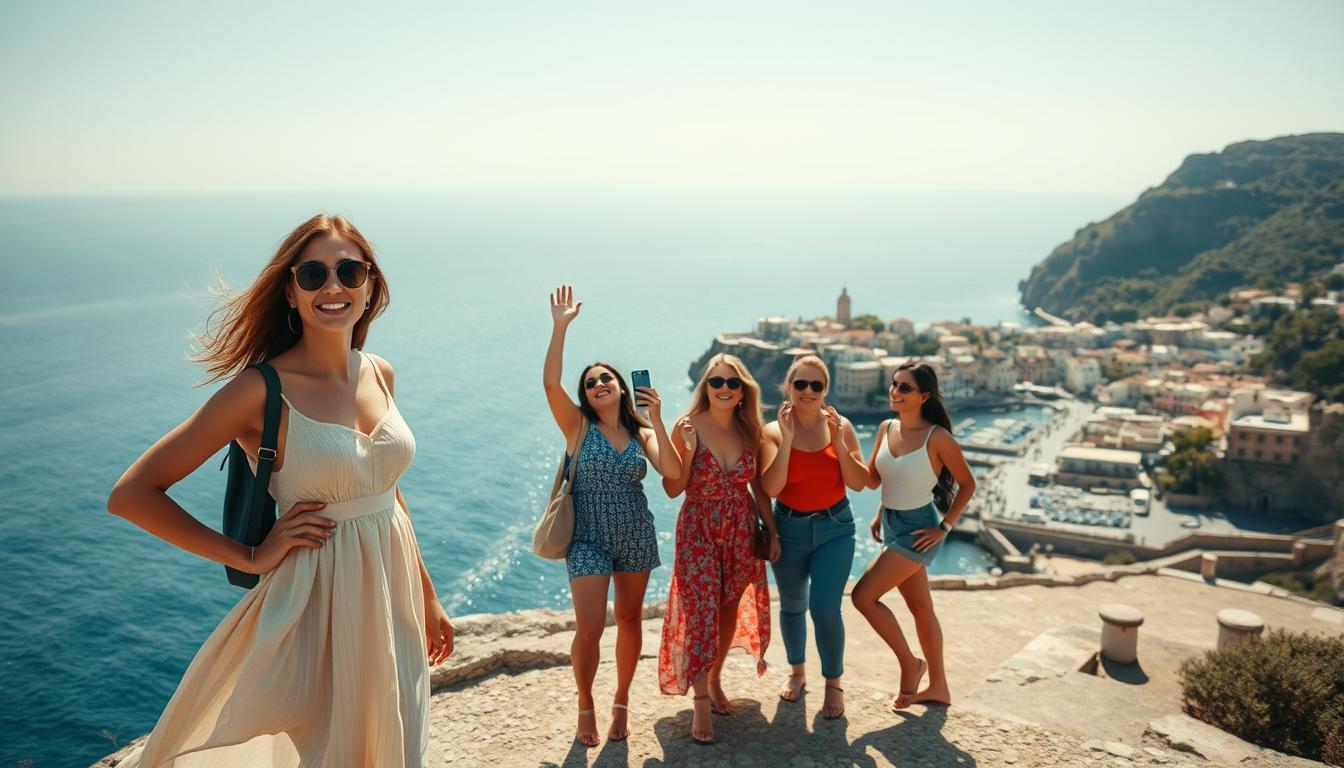
Travel Poses for Instagram
That stiff “stand-and-smile” shot you’ve seen a million times? It’s officially outdated. Modern explorers are ditching generic vacation snaps for dynamic storytelling through body language. Gone are the days when hiding behind sunglasses or turning away from the camera counted as creative expression.
This isn’t just about looking good – it’s about feeling authentic in your adventures. Studies show posts showing genuine emotion get 3x more engagement than posed perfection. Your photos can become visual diaries that capture the thrill of discovery, not just proof you visited a location.
We’ve analyzed thousands of successful travel accounts to identify what makes certain shots irresistible. The secret? Natural movement beats forced positioning every time. Whether you’re scaling mountains or sipping espresso at a café, your posture and expressions can turn ordinary moments into scroll-stopping content.
Key Takeaways
- Modern photography prioritizes personality over perfect poses
- Authentic expressions create stronger audience connections
- Simple techniques help overcome camera shyness
- Dynamic framing beats static standing positions
- Professional tricks work for everyday adventurers
Setting the Stage for Perfect Travel Photos

Your grid tells a story before viewers read a single caption. Curating better travel photos starts with intentional design choices that reflect your unique perspective. This approach transforms random snapshots into a visual journey people want to follow.
Defining Your Visual Signature
Consistency doesn’t mean monotony. Choose 2-3 editing filters that enhance your locations’ natural beauty. Warm tones work well for desert adventures, while cooler palettes highlight mountain escapes. Make sure your color choices complement rather than overpower your subjects.
| Element | Impact | Pro Tip |
|---|---|---|
| Lighting | Sets mood | Golden hour > midday sun |
| Angles | Creates depth | Shoot from hip level |
| Colors | Evokes emotion | Limit palette to 3 hues |
| Negative Space | Highlights subject | Use rule of thirds |
How Body Language Speaks Louder
Relaxed shoulders and natural movements make viewers feel they’re discovering places with you. Twist slightly at the waist when standing still. Lean against walls at 45-degree angles to avoid stiff lines.
Technical camera knowledge helps too. Shooting from chest height flatters most body types. Keep elbows slightly bent to create flowing shapes. These small adjustments make big differences in how audiences connect with your content.
Your visual guide should evolve as you grow. Experiment with new techniques while maintaining core elements that make your feed recognizable. Authenticity always beats perfection.
Embracing Natural Poses for Authentic Travel Photos

Authenticity in photography isn’t about perfect posture—it’s about connection. When your body language mirrors the energy of your surroundings, images become invitations rather than staged displays. This subtle shift transforms how viewers experience destinations through your lens.
Why Natural Angles Work Best
Body lines create visual flow that feels effortless. Turning your shoulders slightly or shifting weight to one hip adds depth without stiffness. These micro-adjustments make you appear relaxed while showcasing the environment’s unique character.
Try “posing without posing” by staying in motion between shots. Adjusting your hat or glancing sideways captures candid energy. Audiences connect more with real moments than frozen smiles.
Creating Visual Interest with Leading Lines
Use limbs to form diagonals that guide the viewer’s eye. A bent elbow pointing toward a waterfall or outstretched leg following a cobblestone path adds professional polish. This method turns simple scenes into layered stories.
Sync your posture with surroundings for harmony. Lean against a railing that mirrors a mountain ridge or angle your body with winding streets. These intentional choices blend human subjects with their backdrop seamlessly.
Mastering the Art of Movement

The secret to engaging photos? Keep moving. Fluid motion transforms stiff compositions into vibrant stories that pull viewers into your adventure. When you let your body flow naturally, every shot becomes a candid snapshot of exploration.
Walking, Running, and Spinning for Dynamic Shots
Walking toward your camera creates natural energy. Shift your gaze slightly sideways or play with your hair mid-stride. These micro-moments add authenticity while showcasing your surroundings.
Burst mode becomes your best friend here. Hold down the shutter while:
- Twirling to make dresses flare
- Jumping on rocky shorelines
- Laughing during a playful sprint
| Movement | Best For | Pro Tip |
|---|---|---|
| Walking | Urban streets | Step forward with back foot lifted |
| Running | Open fields | Capture mid-stride with both feet off ground |
| Spinning | Dramatic landscapes | Time rotation with wind direction |
Wind amplifies motion beautifully. Let gusts tousle your hair while standing on cliffs or beaches. For indoor shots, a quick head turn creates similar energy. Remember: slightly blurred edges often look more artistic than frozen perfection.
Coordinate with your photographer using clear cues. Try counting down “3-2-1-go” before executing moves. This syncs action with shutter clicks for that perfect moment when hair, fabric, and expression align.
Working with Your Hands in Travel Photography

What do you do with your hands when the camera clicks? Awkward limb positioning ruins otherwise great shots, but strategic hand placement can elevate your visual storytelling. Instead of stiff arms or clenched fists, think of fingers as tools for guiding attention and adding depth.
Effective Hand Placement
Resting a hand on your hip creates flattering angles while maintaining natural posture. For softer energy, lightly brush fingertips through your hair – this adds motion without looking staged. When leaning against walls or railings, let your palm graze surfaces to connect with the environment.
Incorporating Props to Enhance Your Shot
Local treats or accessories become purposeful tools for busy fingers. Hold a coffee cup near your chin to frame your face, or adjust sunglasses perched on your head. A pro tip: “Let props tell part of your location’s story” – fresh fruit markets or artisan crafts make meaningful additions.
Remember to keep wrists relaxed and fingers slightly separated. These subtle choices transform idle hands into dynamic elements that complement your photo composition. Your digits aren’t problems to solve – they’re opportunities to add personality.
Enhancing Facial Expressions in Your Travel Shots

Your smile can make or break a shot. The best expressions come from authentic emotions rather than forced grins. Try recalling a funny memory or whispering a joke to yourself right before the shutter clicks – these tricks create crinkled eyes and relaxed features that scream “genuine joy.”
Tips for a Natural Smile
Tilt your head slightly to one side instead of facing straight-on. This simple shift adds personality while keeping your eyes engaged with the lens. For dreamy shots, glance downward as if noticing something fascinating at your feet.
Try these techniques to avoid frozen smiles:
- Take three deep breaths before posing to release tension
- Blink normally instead of holding eye contact too long
- Let wind play with your hair for organic movement
Your profile offers fresh creative possibilities. Turn 45 degrees from the camera and look over your shoulder. This angle highlights facial contours while creating mystery. Pair it with a soft smile that reaches your eyes for maximum impact.
Remember: expressions should match your surroundings. A playful grin works at colorful markets, while thoughtful gazes suit historic sites. Sync your face with the location’s energy to tell richer visual stories.
Experimenting with Different Camera Angles
Your camera’s perspective is the secret ingredient to captivating travel imagery. While most snapshots rely on eye-level framing, creative angles transform ordinary scenes into visual adventures. This technique does more than capture locations—it shapes how viewers experience your journey through the lens.
Utilizing Low and High Angles
Shooting upward from hip level works wonders in urban canyons. Low angles turn narrow alleys into dramatic backdrops while hiding distracting elements like crowds. Tilt your camera slightly to align building edges with your body’s natural lines for geometric flair.
Elevated viewpoints offer fresh storytelling opportunities. Capture cliffside vistas by placing the lens above eye level, blending your silhouette with sweeping landscapes. For beach shots, hold your device high to showcase both footprints in sand and horizon lines.
Alternate between perspectives to keep your feed dynamic. A mix of worm’s-eye and bird’s-eye views adds rhythm to visual narratives. Remember: even a small shift in angle can turn predictable compositions into conversation starters.
FAQ
How do I create a consistent look for my travel photos?
Why does posing matter in travel photography?
What makes natural poses more engaging?
How do leading lines improve my photos?
How can movement improve my shots?
What should I do with my hands in photos?
How can props elevate my travel shots?
How do I achieve a natural smile?
When should I use low vs. high angles?

Adam Peter is a finance, travel, and automotive writer with over a decade of experience. He creates clear, practical content to help readers manage their money, explore the world with confidence, and make informed decisions about cars and travel gear. His work blends expert insight with real-world usefulness.