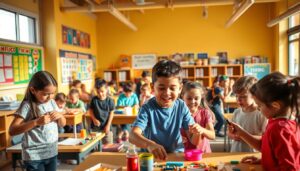
9 Easy Educational Science Experiments Kids Can Do at Home

1. Baking Soda Volcano Eruption
The classic baking soda volcano demonstrates acid-base reactions in spectacular fashion. When vinegar (an acid) combines with baking soda (a base), they create carbon dioxide gas that rapidly expands, creating a foamy “eruption” that mimics volcanic activity. This experiment introduces children to chemical reactions and basic geology concepts.
Materials You’ll Need:
- Empty plastic bottle or cup
- Baking soda (3-4 tablespoons)
- Vinegar (1/2 cup)
- Dish soap (1 tablespoon)
- Food coloring (red or orange)
- Tray or baking dish (to contain mess)
Step-by-Step Instructions:
- Place the empty bottle in the center of your tray or baking dish.
- Pour 3-4 tablespoons of baking soda into the bottle.
- Add a tablespoon of dish soap and a few drops of food coloring.
- When ready for the eruption, pour in the vinegar and step back!
Safety tip: While all ingredients are non-toxic, this experiment can get messy. Consider doing it outdoors or place a plastic tablecloth under your tray for easier cleanup.

2. Secret Message Invisible Ink
This experiment teaches children about chemical reactions and oxidation. Lemon juice contains carbon compounds that are colorless at room temperature. When heated, these compounds break down and react with oxygen in the air, turning brown and revealing the hidden message. It’s real-world chemistry with a spy-worthy twist!
Materials You’ll Need:
- Lemon juice or white vinegar
- Cotton swab or small paintbrush
- White paper
- Heat source (lamp, iron, or hairdryer)
Step-by-Step Instructions:
- Dip your cotton swab or paintbrush into lemon juice.
- Write a secret message on white paper with the juice.
- Allow the paper to dry completely (the message will become invisible).
- To reveal the message, carefully heat the paper using a lamp bulb, iron on low setting, or hairdryer.
Learning insight: This experiment demonstrates how some chemical reactions need heat to occur. The same principle is used in invisible ink technologies throughout history!

3. Walking Rainbow Color Experiment
The walking rainbow experiment demonstrates capillary action—the ability of liquid to flow against gravity in narrow spaces. As water molecules are attracted to the paper towel fibers, they climb upward, carrying the colored water with them. This process also showcases color mixing as primary colors combine to create secondary colors.
Materials You’ll Need:
- 6 clear glasses or plastic cups
- Paper towels (6 half-sheets)
- Food coloring (red, yellow, and blue)
- Water
Step-by-Step Instructions:
- Arrange the six cups in a circle.
- Fill alternate cups with water (1st, 3rd, and 5th), leaving the others empty.
- Add different food coloring to each water-filled cup (red, yellow, and blue).
- Fold each paper towel strip in half lengthwise.
- Place one end of a paper towel strip into a colored water cup and the other end into an empty cup.
- Watch as the colored water “walks” up the paper towel and into the empty cup over several hours.
Learning insight: This experiment demonstrates both capillary action and color theory. As the primary colors mix in the empty cups, they create secondary colors—red and blue make purple, blue and yellow make green, red and yellow make orange!

4. Oobleck Non-Newtonian Fluid
Oobleck is a fascinating non-Newtonian fluid that behaves as both a solid and a liquid depending on the force applied. Named after the Dr. Seuss book “Bartholomew and the Oobleck,” this substance demonstrates how some materials don’t follow Newton’s laws of viscosity, changing their properties when pressure is applied.
Materials You’ll Need:
- Cornstarch (1 cup)
- Water (approximately 1/2 cup)
- Food coloring (optional)
- Large bowl
- Spoon for mixing
Step-by-Step Instructions:
- Pour the cornstarch into a large bowl.
- Gradually add water while stirring until the mixture has a thick consistency.
- Add a few drops of food coloring if desired and mix well.
- Test the oobleck by tapping on it (it should feel solid) and then letting your fingers rest on it (it should feel liquid).
Safety tip: Oobleck can be messy! Cover your workspace with newspaper and avoid pouring it down the drain as it can clog pipes. Let it dry out and then throw it in the trash.

5. Colorful Density Tower
This beautiful layered liquid experiment demonstrates density—how much mass is contained within a given volume. Different liquids have different densities, causing them to stack in distinct layers rather than mixing. This experiment teaches fundamental physics concepts while creating a visually stunning rainbow effect.
Materials You’ll Need:
- Tall, clear glass or plastic cylinder
- Honey or corn syrup
- Dish soap (preferably colorful)
- Water
- Vegetable oil
- Rubbing alcohol
- Food coloring (various colors)
Step-by-Step Instructions:
- Pour honey or corn syrup into the bottom of your container (about 1 inch).
- Carefully add dish soap as the next layer.
- Mix water with food coloring and slowly pour it down the side of the container.
- Gently add vegetable oil as the next layer.
- Mix rubbing alcohol with a different food coloring and very slowly add it as the top layer.
Learning insight: Objects float or sink based on their density compared to the liquid. Try dropping small items like a grape, cherry tomato, or metal bolt into your density tower and observe where they settle!

6. Magical Static Electricity Butterfly
This experiment demonstrates static electricity—the imbalance of electric charges within or on the surface of a material. When you rub the balloon against hair or wool, electrons transfer to the balloon, giving it a negative charge that attracts the positively charged paper butterfly. It’s a perfect introduction to basic physics and electrical forces.
Materials You’ll Need:
- Tissue paper
- Scissors
- Balloon
- Wool fabric or hair
- Thread (optional)
Step-by-Step Instructions:
- Cut a butterfly shape out of tissue paper.
- Inflate the balloon and tie it closed.
- Rub the balloon vigorously against your hair or a wool fabric for 30 seconds.
- Hold the balloon near (but not touching) the paper butterfly and watch it “magically” fly toward the balloon.
Learning insight: Static electricity works best in dry conditions. If it’s a humid day, you might need to rub the balloon longer to build up enough charge for the experiment to work effectively.

7. Sparkling Sugar Crystals
Growing sugar crystals demonstrates the process of crystallization—how dissolved particles come out of solution and form solid structures with regular patterns. This experiment introduces concepts of supersaturated solutions and shows how crystals form in nature, from snowflakes to gemstones, while creating a beautiful edible result.
Materials You’ll Need:
- Sugar (2 cups)
- Water (1 cup)
- Clean glass jar
- Wooden skewer or string
- Pencil or stick
- Food coloring (optional)
- Clothespin
Step-by-Step Instructions:
- Boil the water and gradually stir in sugar until no more will dissolve (supersaturated solution).
- Add food coloring if desired.
- Pour the solution into a clean jar.
- Dip the skewer in water, then roll it in dry sugar to create “seed crystals.”
- Attach the skewer to a pencil with a clothespin and suspend it in the solution without touching the sides.
- Cover the jar loosely with paper towel and place in an undisturbed location.
- Check daily for 5-7 days as crystals form and grow.
Learning insight: Crystals need time to grow! The slower the water evaporates, the larger and more defined your crystals will be. Patience yields the most impressive results in this experiment.

8. Magic Milk Color Explosion
This mesmerizing experiment demonstrates surface tension and molecular polarity. Milk contains fat molecules and proteins suspended in water. When dish soap is added, it breaks the surface tension and causes the fat molecules to move rapidly, creating swirling patterns with the food coloring. It’s chemistry that looks like magic!
Materials You’ll Need:
- Shallow dish or plate
- Whole milk (works better than low-fat)
- Food coloring (various colors)
- Dish soap
- Cotton swab
Step-by-Step Instructions:
- Pour enough milk to cover the bottom of the dish (about 1/2 inch deep).
- Allow the milk to settle and reach room temperature.
- Add drops of different food colors scattered across the surface.
- Dip the tip of a cotton swab in dish soap.
- Touch the soap-dipped swab to the center of the milk and watch the explosion of color!
- Try touching different areas to see how the colors continue to move and swirl.
Learning insight: The dish soap molecules have a hydrophilic (water-loving) end and a hydrophobic (water-repelling) end. This causes them to attach to fat molecules in the milk, creating movement as they rearrange themselves.

9. Naked Egg Science
This fascinating multi-day experiment demonstrates chemical reactions and osmosis. Vinegar contains acetic acid that dissolves the calcium carbonate in eggshells, leaving behind the semi-permeable membrane. This allows you to observe osmosis as liquids pass in and out of the egg based on concentration differences.
Materials You’ll Need:
- Raw eggs
- White vinegar
- Clear containers
- Various liquids for testing (corn syrup, colored water, etc.)
- Tongs or spoon
Step-by-Step Instructions:
- Carefully place a raw egg in a clear container.
- Cover the egg completely with white vinegar.
- Watch as bubbles form on the eggshell (this is carbon dioxide from the chemical reaction).
- Leave the egg in vinegar for 24-48 hours until the shell dissolves completely.
- Carefully remove the “naked” egg (the membrane remains intact) and rinse gently.
- Place the naked egg in different liquids to observe how it changes size through osmosis.
Safety tip: The naked egg is fragile but bouncy! Handle with care and always wash hands after touching raw eggs to prevent salmonella contamination.

Spark Your Child’s Scientific Curiosity Today!
These kids science experiments at home do more than just entertain—they plant seeds of scientific thinking that will grow throughout your child’s life. Each experiment creates those magical “aha!” moments where curiosity meets understanding. The best part? You’ve already got most of these supplies in your kitchen cupboards!
Science isn’t just for laboratories—it’s happening all around us every day. By exploring these simple experiments together, you’re helping your child develop critical thinking skills, patience, and a deeper appreciation for the world’s wonders. So grab those measuring cups, clear some counter space, and get ready for some scientific adventure!!


Adam Peter is a finance, travel, and automotive writer with over a decade of experience. He creates clear, practical content to help readers manage their money, explore the world with confidence, and make informed decisions about cars and travel gear. His work blends expert insight with real-world usefulness.