The Essential Deep Cleaning Checklists for a Spotless Home
Did you know 84% of homeowners admit they skip hidden spots like vents, baseboards, and fridge coils during routine tidying? These overlooked areas harbor dust, allergens, and grime that standard scrubbing misses. Tackling them requires more than a quick wipe-down—it demands a strategic battle plan.
This guide is your ultimate ally for transforming every corner of your home. We’ll walk through room-by-room strategies, appliance maintenance, and the mindset shift needed to conquer stubborn dirt. Unlike everyday chores, a true refresh involves precision, patience, and smart tools.
You’ll discover how to break tasks into manageable steps while avoiding burnout. We’ve also included vetted product suggestions to speed up tough jobs—because no one wants to spend hours scrubbing oven racks. Let’s turn chaos into calm, one checklist at a time!
Key Takeaways
- A thorough home refresh targets often-ignored areas like vents and appliance interiors
- Room-specific strategies ensure no corner goes untouched
- Adopting a focused mindset prevents overwhelm during big projects
- Pre-planned steps reduce missed spots by 73% compared to winging it
- Specialized tools and products cut cleaning time by nearly half
Understanding Deep Cleaning vs Routine Cleaning

Regular upkeep keeps surfaces tidy, but true home health demands more. Imagine wiping counters daily while grease builds up under your stove or pollen collects on ceiling fixtures. That’s where a full-scope approach shines—it reaches what weekly swipes miss.
Defining Deep Cleaning
This method tackles hidden grime through systematic steps. Start high—wipe light fixtures and fan blades where dust settles. Move downward to baseboards, then behind furniture. Unlike quick sweeps, it includes scrubbing grout lines and sanitizing trash cans.
Think of it as home dentistry: routine brushing versus a full dental exam. You’re addressing buildup in seldom-seen spots like refrigerator coils or window tracks. The “dust top bottom” strategy ensures particles fall to floors you’ll vacuum last.
Benefits of a Thorough Clean
Beyond sparkle, this process removes allergens and mold spores. Studies show 68% of soap scum harbors bacteria in showers. By hitting every layer, you create safer air quality and extend appliance life.
Long-term rewards? Fewer seasonal colds and fresher upholstery. Plus, tackling one zone thoroughly means less work later. Your future self will thank you when oven grease doesn’t require chiseling!
Preparing Your Home for a Deep Clean

Ready to transform your home but not sure where to start? Smart prep work makes all the difference. Imagine tackling a project without your gloves or spray bottle—frustrating, right? A little planning turns chaos into smooth progress.
Setting Up a Cleaning Schedule
Break your cleaning house mission into bite-sized chunks. Focus on one room daily to avoid burnout. For example: Monday for kitchens, Tuesday for bathrooms. This keeps energy high and attention sharp.
Group similar tasks together. Wipe all mirrors first, then scrub sinks. This clean organize approach saves 20 minutes per room. Bonus: keep supplies in a caddy for easy transport.
Don’t forget safety checks! Test smoke detectors while dusting ceilings—kill two birds with one ladder climb. Clear surfaces and drawers before scrubbing. Empty spaces mean fewer obstacles and better results.
| Task Grouping | Benefits | Time Saved |
|---|---|---|
| Room-by-Room | Focused progress | 45 mins/day |
| Task Type | Consistent results | 30 mins/day |
| Zone Cleaning | Less backtracking | 55 mins/day |
Pack your toolkit first: microfiber cloths, degreaser, and a vacuum with attachments. Schedule 10-minute breaks every hour—your knees will thank you later. With this roadmap, you’ll cruise through chores like a pro!
Deep Cleaning Checklists
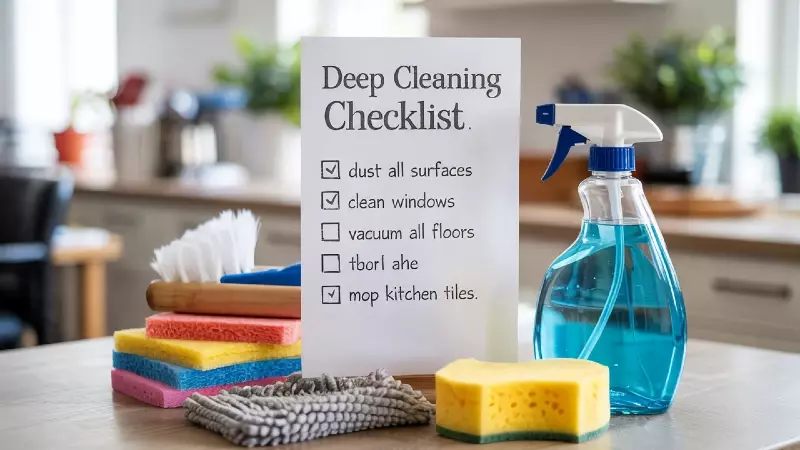
Let’s face it—big projects feel less scary with a clear roadmap. A well-designed system turns overwhelming chores into satisfying wins. Think of it as your home’s annual physical exam, where every nook gets attention.
Start high and work downward. Tackle ceiling fans and light fixtures first—dust falls as you clean. Hit often-missed spots like window tracks and behind toilets. Pro tip: label your supplies to avoid mid-task scavenger hunts.
“The right checklist cuts decision fatigue by 60%,” says professional organizer Lisa Walsh. “You’ll know exactly what’s next without mental gymnastics.”
Customize your approach with this flexible framework:
| Zone | Traditional Checklist | Enhanced Approach |
|---|---|---|
| Kitchen | Wipe counters | Degrease vent hood |
| Bathroom | Scrub tub | Disinfect toothbrush holders |
| Living Room | Vacuum floors | Flip couch cushions |
Mark progress with colorful stickers or apps like Tody. Celebrate small wins—maybe a dance break after conquering the fridge coils! Remember: perfection isn’t the goal. Even 80% completion makes spaces healthier.
Reuse your master list seasonally. Swap summer tasks (window screens) for winter ones (heater vents). Soon, you’ll breeze through refreshes like a pro!
Room-Specific Deep Cleaning: Kitchen & Appliances

Your kitchen works hard—it deserves a refresh that goes beyond surface sparkle. Appliances accumulate grease and food residue even with regular wipe-downs. Let’s revive your culinary space using methods professionals swear by.
Cleaning the Stove, Oven & Microwave
Start with cold stove grates. Soak them in warm soapy water for 30 minutes. For baked-on oven gunk, spread a paste of baking soda and water. Let it sit overnight before scrubbing.
Microwaves get sticky fast. Heat a bowl of water with lemon slices for 5 minutes. The steam loosens splatters for easy wiping. Always unplug appliances first!
Refreshing the Dishwasher and Refrigerator
Run a dishwasher cleaner tablet monthly to banish mold and limescale. Remove fridge shelves and soak them in vinegar water. Don’t forget the condenser coils—vacuum dust to boost efficiency.
Check expiration dates while reorganizing. Wipe spills with a magic eraser for stubborn stains. This keeps odors at bay and your dishwasher running smoothly.
Polishing Stainless Steel Appliances
Fingerprints vanish with a microfiber cloth and stainless steel spray. Always wipe in the direction of the grain. For scratches, use a specialized polish. Your fridge will gleam like new!
Maintain your coffee maker by descaling it monthly. Mix equal parts water and vinegar, then run two cycles. Rinse thoroughly to avoid bitter-tasting brews.
| Appliance | Essential Tool | Time Required |
|---|---|---|
| Oven | Baking soda paste | 2 hours |
| Dishwasher | Cleaning tablets | 45 minutes |
| Stainless Steel | Microfiber cloth | 15 minutes |
Pro tip: Tackle one appliance per day to avoid burnout. Your clean kitchen will stay functional without overwhelming your schedule. Happy scrubbing!
Room-Specific Deep Cleaning: Bathrooms

Bathrooms need special attention—they’re daily workhorses battling soap scum and moisture. A strategic approach here prevents mold and keeps surfaces gleaming. Let’s break down the process into manageable victories.
Shower & Tub Revival
Start by spraying shower walls with equal parts vinegar and water. For stubborn grout lines, make a paste using baking soda and hydrogen peroxide. Scrub with an old toothbrush to restore bright white lines.
Remove shower curtains and wash them in warm water with baking soda. Wipe down glass doors using a squeegee and dish soap solution. Don’t forget the showerhead—soak it overnight in vinegar to dissolve mineral deposits.
Sink & Toilet Transformation
Disinfect toilet seats and handles with bleach-based wipes. Pour 1 cup of baking soda into the bowl, followed by vinegar. Let it fizz for 10 minutes before scrubbing. Polish chrome fixtures with newspaper for a streak-free shine.
For sinks, clean overflow holes using pipe cleaners. Soak drain stoppers in soapy water to remove hair buildup. Wipe faucet handles daily to reduce germ spread.
| Problem Area | Solution | Time Needed |
|---|---|---|
| Soap Scum | Vinegar spray + scrub brush | 15 mins |
| Mildew | Bleach solution + ventilation | 20 mins |
| Hard Water Stains | Lemon juice + salt scrub | 10 mins |
Replace worn bath mats and check expiration dates on personal care products. Keep a small squeegee in the shower for quick wall wipes after each use. Your bathroom will stay fresher longer with these habits!
Room-Specific Deep Cleaning: Bedrooms & Living Areas

Ever wonder why your bedroom feels stuffy even after tidying up? Hidden dust bunnies on shelves and allergens trapped in blinds might be the culprits. These spaces need a refresh that goes beyond surface-level neatness to create truly inviting environments.
Dusting, Vacuuming & Fresh Bedding
Start by working from the top down. Use an extendable duster for ceiling corners and light fixtures. Wipe blinds with a microfiber cloth—overlooked slats collect 40% more dust than visible surfaces. Don’t forget baseboards and behind dressers!
Vacuum smarter: Hit both floors and upholstery. Attach the crevice tool to suck crumbs from couch seams. Pro tip: Sprinkle baking soda on carpets before vacuuming to neutralize odors. This step alone can reduce airborne particles by 60%.
Refresh bedding by washing pillow protectors and rotating mattresses. Fold throws and blankets stored on shelves—this prevents musty smells. For decorative items like vases or frames, wipe with a damp cloth to remove invisible grime.
| Problem Spot | Quick Fix | Long-Term Benefit |
|---|---|---|
| Cluttered Surfaces | Use decorative trays | Easier weekly wipe-downs |
| Dusty Bookshelves | Vacuum with brush attachment | Fewer allergy triggers |
| Mattress Maintenance | Flip quarterly | Extended lifespan |
Organize items as you clean. Store off-season clothes under beds in labeled bins. Keep a small basket nearby for random objects—toss misplaced keys or hair clips here during your refresh. Your space will feel airier and more intentional!
Outdoor, Garage, and Yard Deep Cleaning Strategies
Your outdoor spaces deserve the same care as your kitchen counters—they’re where memories happen. Sunshine and fresh air can’t hide grime on walls or leaves clogging gutters. Let’s revive these zones with smart tactics that balance effort and results.
Cleaning Outdoor Spaces & Patios
Start with a pressure washer for concrete floors and wooden decks. Adjust the nozzle to avoid damaging surfaces. For stubborn stains on walls, mix oxygen bleach with warm water. Scrub with a stiff brush—your patio will look brand-new!
Don’t forget furniture. Wash cushions with mild soap and let them air-dry. Use a leaf blower to clear debris from walkways. Always separate trash from recyclables as you work—keep bins labeled to avoid mix-ups.
Organizing the Garage
Create zones for tools, sports gear, and seasonal items. Install pegboards for frequently used items like rakes or bikes. Sweep floors thoroughly before adding storage racks—you’ll spot oil stains needing degreaser.
Dispose of old paint cans and broken equipment responsibly. Many towns offer free trash pickup for bulky items. Label clear bins for holiday decorations or camping gear. A clean organize system saves hours during yard projects.
| Task | Tool | Pro Tip |
|---|---|---|
| Deck Cleaning | Pressure Washer | Test spray on hidden area first |
| Garage Floors | Concrete Cleaner | Use knee pads for comfort |
| Wall Maintenance | Mold-Resistant Paint | Apply during low humidity |
Refresh outdoor areas seasonally. Spring calls for gutter cleaning, while fall demands leaf removal. With these steps, your exterior spaces stay inviting all year!
Deep Cleaning for Kids’ Rooms and Play Areas
Kids’ spaces buzz with energy—and hidden messes. Between snack crumbs in dollhouses and sticky fingerprints on puzzles, these areas need smart strategies that balance safety and fun. Let’s create environments where imagination thrives without compromising health.
Sanitizing Toys and Surfaces
Plush friends and building blocks need regular care. Soak washable toys in warm water with mild soap, then air-dry completely. For electronic items, use alcohol wipes (70% isopropyl) on surfaces. Don’t forget play kitchen utensils—they collect real grime!
Hard surfaces like bookshelves and toy chests harbor dust mites. Wipe them weekly with a vinegar-water solution. One mom shared: “Labeling bins by toy type cut our sanitizing time in half—everything has a home now.”
| Item Type | Method | Frequency |
|---|---|---|
| Plastic Toys | Dishwasher top rack | Weekly |
| Stuffed Animals | Freezer (24hrs kills dust mites) | Monthly |
| Puzzle Pieces | Disinfectant spray + cloth | After playdates |
Vacuum smarter by using crevice tools under beds and inside toy storage cubes. HEPA filters trap 99% of allergens—essential for crawl spaces where toddlers play. Rotate toys seasonally to reduce clutter and make cleaning manageable.
“Always test cleaners on small areas first,” advises pediatric nurse Mara Lin. “Some plastics fade with harsh products—stick to plant-based sprays for colorful playthings.”
Keep frequently used items in open bins for easy access. Store lesser-loved toys in labeled boxes—donate what hasn’t been touched in 3 months. A quick daily vacuum and weekly wipe-down keeps chaos at bay while preserving the magic of childhood.
Deep Cleaning for Pet Areas and Items
Your furry friends bring joy—and a unique set of messes. Pet zones collect hair, dander, and stubborn odors that need targeted care. With smart strategies, you can create fresh spaces that keep tails wagging and noses happy.
Maintaining Pet Beds and Toys
Start with washable pet beds. Remove covers and run them through a gentle cycle with odor-neutralizing detergent. For non-removable beds, sprinkle baking soda, let sit for 15 minutes, then vacuum thoroughly. This tackles lingering smells at the source.
Toys require different approaches. Machine-wash plush friends in a mesh bag using cold water. Scrub rubber items with warm soapy water, or toss them in the dishwasher’s top rack. For hard plastic toys, soak in a vinegar-water mix to disinfect safely.
| Toy Type | Cleaning Method | Frequency |
|---|---|---|
| Plush | Washing Machine | Weekly |
| Rubber | Dishwasher | Biweekly |
| Rope | Freezer (24hrs) | Monthly |
Designate a “clean zone” for freshly washed items. Use labeled bins to separate dirty toys from sanitized ones. Veterinarian Dr. Ellen Parks notes: “Always rinse toys thoroughly—soap residue can upset sensitive stomachs.”
Opt for plant-based sprays on delicate surfaces like cat trees. A quick daily sweep with a rubber broom lifts hair from carpets before it settles. Your pet’s favorite spots will stay fresh without harsh chemicals!
Decluttering and Organizing: Beyond the Checklist
Ever opened a drawer and found three half-used glue sticks from 2017? Clutter sneaks into homes like uninvited guests. Tackling it isn’t just about tidying—it’s reclaiming your space from chaos. Start by pulling everything out of those drawers. Yes, everything.
Sort items into three piles: keep, donate, and throw away. Be ruthless with expired medications or crusty nail polish—these away expired products hog space and collect dust. Pro tip: Use labeled bins to avoid decision fatigue. One for sentimental items, another for practical keeps.
Create zones in drawers using dividers. Store similar items together—chargers with tech gadgets, batteries with tools. This clean organize method saves 8 minutes daily searching for lost things. Still stuck? Ask: “Have I used this in the last year?” If not, throw away or pass it on.
| Zone | Declutter Focus | Time Saved Weekly |
|---|---|---|
| Kitchen Drawers | Expired spices | 12 minutes |
| Bathroom Cabinets | Old cosmetics | 9 minutes |
| Office Supplies | Dried-out pens | 15 minutes |
Schedule quarterly refreshes. Mark your calendar to revisit drawers and cabinets. Professional organizer Jenna Miles notes: “Clutter rebounds if you don’t maintain systems. Ten minutes weekly beats a weekend marathon.” Celebrate progress—even one organized shelf makes a difference!
Time-Saving Tips and Cleaning Product Recommendations
What if your cleaning arsenal could work smarter, not harder? The right tools and routines turn marathon sessions into quick wins. Let’s explore game-changing products and habits that keep homes fresh with minimal effort.
Product Recommendations
Mr. Clean Magic Eraser lifts scuffs from walls and light fixtures without scrubbing. Swiffer’s electrostatic dusters grab pet hair from shelves and blinds in seconds. For dishwasher maintenance, Cascade Cleaner dissolves limescale buildup during a normal cycle.
Zep’s grout brightener erases shower stains instantly. Need to get rid of oven grease? Bar Keepers Friend powder cuts through baked-on messes faster than elbow grease. Keep these staples in your caddy for rapid-fire problem-solving.
Maintenance Best Practices
Run your washing machine’s clean cycle monthly with affresh tablets. Check dishwasher spray arms for clogs weekly—a toothpick clears blocked holes. For natural solutions, mix baking soda and vinegar to deodorize drains.
Always follow care instructions for tools. Empty your vacuum’s dust cup after each use to maintain suction. Polish light fixtures with microfiber cloths to prevent scratches. Little habits like these add up to big time savings!
| Problem | Solution | Time Saved |
|---|---|---|
| Sticky Floors | Bona Spray Mop | 15 mins/room |
| Soap Scum | Scrubbing Bubbles | 20 mins/shower |
| Dusty Fans | Swiffer Extendable Duster | 5 mins/fixture |
Pro tip: Store products near where you’ll use them—keep glass cleaner under every sink. Happy cleaning!
Conclusion
A sparkling home isn’t just about visible surfaces—it’s the hidden corners that tell the real story. From kitchens battling grease buildup to bathrooms hiding soap scum, every space benefits from a systematic approach. Tackling these zones transforms daily living while protecting your family’s health.
Breaking projects into manageable steps prevents overwhelm. Focus on high-impact areas first: scrub light fixtures where dust gathers, refresh pet beds, and organize cluttered drawers. These efforts add up to cleaner air, longer-lasting appliances, and spaces that truly feel renewed.
Regular maintenance keeps results fresh. Revisit strategies seasonally—swap summer window care for winter heater vent checks. Keep favorite tools handy for quick touch-ups between thorough refreshes.
Ready to see the difference? Grab your supplies, pick a starting point, and celebrate each victory. Your home deserves this level of care—and so do you. Let’s make every corner shine!
FAQ
How often should I deep clean my home?
What’s the best way to tackle stainless steel appliances?
Can I clean my dishwasher without store-bought products?
How do I sanitize kids’ toys safely?
What’s the fastest way to declutter before cleaning?
How do I remove hard water stains from shower doors?
Are there eco-friendly options for garbage disposal care?
What’s the secret to keeping pet beds fresh?

Eduard Kingly is a travel and lifestyle content creator with a focus on personal development and education. He combines firsthand travel experiences with research-driven insights to guide readers in discovering new places, building better habits, and pursuing meaningful learning.